Sunday, November 14, 2010

It's been awhile.

Well, I'm officially bad blogger. Boo on me. :(

It's been almost 3 months since I last posted, which mainly means that I'm busy and lazy. But, please don't think that I've given up the baking, because that's not true.

Over the past 3 months I've:
1)  Made an Apple Gallette
2)  Ate at Katz's Deli with one of my best friends
3) Watched the Battle of the Bars in Astoria (field day)
4) Was a bridesmaid
5) Bought Tricky a bed (which he loves)
6) Saw Eels live at Terminal 5
7) Went to a bridal shower
8) Made Chocolate Stout Cake
9) Made Baked Apples
10) Danced with Jeremy Cooks Dinner (best dance ever) at LKS's wedding
11) Made Popovers
12) Demolished a fish
12) Had my first anniversary with Jeremy
13) Made two failed dishes: Veggie Chips and Lemon Bars
14) Learned how to Bake Bread at Home at the CIA

WHEW, that's a lot. And here's a picture montage of some of the above-mentioned events. Enjoy! (Also, I plan to bake a pie next weekend and promise to actually blog about it). :D


Thursday, August 26, 2010

Back by popular demand.


I know I've been a very bad blogger. I sorry. :(

BUT! But, but, but!

Ok, I don't have a really good "but" (though Jeremy would argue that my butt is very nice), but I have a good recipe to share, which should hopefully make up for my tardiness in posting.

A few weeks back, Jeremy had a get-together at his place to test out "The Ingredient." Whilst the chili (I'm not sure why I have such a hard time remembering whether that word has one or two Ls...) was cooking, I decided to make some baked treats for the hungry guests waiting in the living room. Jeremy had requested his favorite type of cookie be made: the chocolate chocolate chip. And, so, I happily obliged. How could I resist an opportunity to partake in one of my favorite activities and test it on a bunch of friends?

Anyway, I used a recipe I found on Epicurious.com that was actually meant for chocolate mocha sandwich cookies. That seemed like a lot of work for some quick baking, so I just decided to make the cookie part.

Chocolate Chocolate-Chip Cookies with Mocha Cream Filling

COOKIES ONLY!!!

  • 1 cup all purpose flour - Yep
  • 3 tablespoons unsweetened cocoa powder - Mhmm
  • 1 teaspoon baking soda - Oh yes... I should probably purchase some new stuff, but it will do.
  • 1/2 teaspoon salt - okie
  • 1/2 cup (1 stick) unsalted butter, room temperature - Room temp is always important when blending!
  • 2/3 cup (packed) golden brown sugar - Oh dear, only had dark brown... it's ok. Dark brown sugar actually has more molasses in it, which makes it sweeter. Since I wasn't going to do the mocha filling, the extra sweetness here may have made up for it. (Here's more info on the difference between brown sugars)
  • 1/4 cup sugar - Gotta love the white and brown sugar mixes!
  • 1 large egg - Sure
  • 2 teaspoons water - Easy enough
  • 1 teaspoon vanilla extract - Got it
  • 1 teaspoon instant coffee granules - I always have this on hand. Most chocolate baking recipes call for it and if they don't, then you should consider adding a little in... it helps bring out the natural flavor of chocolate. My boss actually taught me that trick. :)
  • 2 cups semisweet chocolate chips (about 12 ounces) - I used chocolate chunks instead. According to David Lebovitz chocolate chips were actually manufactured to prevent the chocolate melting in the oven. Chocolate chunks, however, do melt, which, of course, makes for a gooeyer (is that a word?) cookie. NOM.
  • 1 cup pecans, coarsely chopped - I cut these out since they're really polarizing with guests... and lots of people have weird nut allergies these days. Why take the risk?

So, with all the above in mind, I set out to make these chocolatey cookies. And, let me tell you, they were a hit. Made me feel all warm and gooey inside, all analogy intended. Unfortunately, I didn't have the time or space or camera to really capture all this on film at the time.

BUT! But, but, but! But, Jeremy asked me to make these cookies again last night after we cooked some delicious pasta - which I believe he will post about soon - and watched Kick-Ass. And so, I did!

Everyone loves a good picture. Or five.

Sugar and butter! (I love how brown sugar sticks to the measuring cup.)


Dry ingredients! (I used a wisk to get the lumps out rather than sifting... tsk, tsk Thrifty Sifter.)

I can't even begin to explain how much I love this thing.


 Mostly because it does awesome things like this:
(Psssst. You with the hawk-eyes. You noticed that I used chocolate chips the second time. 
This was because no one had stupid chunks. The chips were just fine!)


NOM!

NOM NOM NOM NOM NOM NOM!


Finally, a but I can follow up!

Icing: Tori Amos - Abnormally Attracted To Sin (album)

Saturday, July 31, 2010

These are genius.

I've been playing around with the idea of customizable food in my brain (BRAINS!) and already found a few already-implemented business ideas to observe.

The first I found on the intertubes via some links in my Daily Candy NYC newsletter (I think). It drove me to this: Chocri

And it's not just normal old chocolate ideas. They have things like dried apples and bananas to coriander and chives to nuts, gummy bears, and "rice crispies." You can choose any type of chocolate (milk, dark, white, and a mix of milk and white). And voila! You have your own chocolate bar. It's a little pricey ($6.50 for the base 3.5 oz chocolate bar plus toppings), but what do you expect for customizable chocolate bars! YUMMMM.

The second thing I came across was while I was watching a new show on Food Network called "Kid in a Candy Store," which is essentially the televised travels of a really lucky guy who gets to go to all the unique dessert locales in the country, and came across the most genius idea: customizable ice cream.

 iCream Cafe

Using science, they allow you to make your own types of ice cream based on their flavors, mix-ins, and even food coloring options. They make it all right in front of you with an every-day standing mixer and a blast of nitrogen. On cold days - hey, it IS Chicago - they you can also make your flavor of pudding that they boil on the spot with an espresso machine milk steamer. Pretty awesome, no?

And, I just found out from an awesome friend that there is a place in NYC that also does this called Lulu and Mooky's: http://www.yelp.com/biz/lulu-and-mookys-liquid-nitrogen-ice-cream-new-york

Must go check it out!!!

Friday, July 16, 2010

I have to do what?

After a 2 week hiatus from baking due to packing and vacation in the Land of Awesome with Jeremy Cooks Dinner (aka Mr. Boyfriend), I am back and better than ever.

As I mentioned a bunch of entries ago, my mom got me a new baking book called Ready for Dessert the title of which I am in full agreement with (ooooooh, I ended a sentence with a preposition). 

Once I had unpacked and done my laundry, I decided to crack it open and see what kinds of fancy cookies I could make in a small amount of time with the smallest number of un-purchased ingredients. 

Twees?

Twills?

I have no idea how to pronounce this.

Sesame-Orange Almond Tuiles
Requires:
- Butter, check
- Sesame oil, check
- Freshly squeezed orange juice, ugh
- Zest of an orange, ok
- Sugar, check
- Flour, check
- Sliced almonds, fine, fine
- Sesame seeds, got them!

Ok, so that's not so bad. I only need to purchase an orange and sliced almonds (because I'm certainly not going to attempt slicing the whole almonds I already own). So, I go off to the store and pick up the necessaries after purchasing some sushi noms for dinner.

Post fishes, onto baking!


First I mix the first five ingredients in a pan over low heat until melted. Easy enough.


Then I stir in the dry stuff and let the batter rest for an hour on the counter (and watched my DVR-ed episode of True Blood.)


Post True Blood...


Baking is always easy! Just put it in the oven! 


And take it out after said designated time (or when it looks done because my oven is a nutball).


P.S. I was really unsure if I had done this cookie drop correctly. The recipe said only 4 cookies per tray and this thing makes 20 cookies. It's a good thing I believed the recipe and didn't go with my gut 'cause...


Yeah, that's what they looked like after 8 minutes in the oven. 

Slightly unexpected.


Well, that wasn't so bad. I did burn myself rotating the pans in the oven, but whatever. Comes with the territory.

Let's see, what's next... 

Uh. 

I have to do what? 

Right. 

...

I have to remove the cookies from the burning hot pan that I already singed my wrist on and place them over a rolling pin to cool?

And, if they don't start to mold, I have to put them back in the oven and start the burning-myself process all over again?


????????????????????????


??


?


Awesome.


Overall, the cookies came out well and looked pretty much like the photos in the cookbook, though I think they were on the large side. Next time I won't flatten them out so much.


Mr. Boyfriend really enjoyed them.


And so did Arthur.


My Icing: Tool - Undertow ("It was the cries of the carrots.")

Wednesday, July 14, 2010

I promise there's one coming!

Sorry for the 2 weeks off! I was preparing for my trip to the Grand Canyon with Jeremy Cooks Dinner and then spent a week in AZ and UT gallivanting around canyons and hiking and whatnot.

I did bake on Sunday and have pictures and narrative to post! Hopefully tonight.

Catch ya later!

Thursday, June 24, 2010

Blender Cookies

I love my blender. It's black and cute and has sharp blades. And it also moonlights as a food processor.

This came in handy when I re-attempted to make Mr. Boyfriend's almondine cookies (finally!).

Almond cookies are surprisingly easy to make. AND (big AND, hence the caps) the recipe I used had absolutely no fat in it.

Naturally, the absence of oil or butter or anything fatty seemed like a mistake, but I decided to take the recipe for it's word and go for it.

Oh, and I finally remembered to buy the almond extract.

Overall, the output was pretty good. The recipe called for oiling the cookie sheet and placing parchment paper over it, but it made the bottoms of the cookies burn and a little greasy so next time I might skip the oil.

It also seemed as though it was missing some essential spices. Next time I might add some nutmeg or cinnamon. Definitely needs a kick.

And now I bring you PICTURES!


(Egg whites are so easy to turn into this creamy, shiny awesomeness 
with a hand mixer. Why I waited so long to get one is beyond me.)


Icing: Pixies - Debaser

Wednesday, June 23, 2010

The Accidental Brownie

As a way of expanding my baking knowledge, I asked Mr. Boyfriend what I should attempt next. Without hesitation he said, "Almondine cookies," as these are his absolute favorites. And, so, I set out to find a recipe to emulate.

Since Lazzaroni Amaretti di Sorono have a seriously deep hold on Mr. Boyfriend's psyche, I was definitely in for some hard work. And there was certainly a lot to live up to.

So, after a few days of searching, I settled on a recipe I found on Epicurious.com and after a quick trip to Target, voila! I was set. All I needed was the almond extract.

A few days later Mr. Boyfriend and I set out to have a culinary date at my place. He was going to make us some deliciousness for dins and I was in charge of the sweets. Together we ran to the supermarket excited for the evening's fun and purchased everything we needed. And, when we got home I realized the major mistake.

I forgot the almond extract.

Oh, cwap.

What do I have in the cabinet? Cocoa powder, a few squares of baker's chocolate, flour, sugar, baking powder... "I know! I'll make chocolate cookies!" I exclaimed after a few glasses of vino.

(***For reference, here's the original recipe: Chocolate Peanut Butter Chip Fudge Cookies***)

In my head, I was like, "SCORE! I have almost all the ingredients." Which would have been fine had I had the correct proportions of all the other ingredients. Either way, my tipsy self decided to forage ahead.


So, using the whole recipe with the exception of a few things I began combining and beating and mixing. Here are my revisions:
- 3/4 cup chopped almonds (because I was supposed to make almondine cookies)
- 1/4 bag of semisweet chocolate chips (about 3 oz... instead of 12 oz)
- 4 squares of baking chocolate (about 2 oz... instead of 6 oz)
- 2 tbs unsweetened cocoa powder (because I was short on the other chocolate)- NO COCONUT
- NO PEANUT BUTTER CHIPS


Anyone who knows anything about baking knows it's about science and precise measurements. In fact, professional bakers generally measure in weight rather than volume so that they can be as accurate as possible. With that said, it should have been no surprise that the "dough" (if you can call it that) didn't turn out quite right. In fact, it was pretty much, downright wrong.

I called Mr. Boyfriend into the kitchen, poured out my liquidy, chocolatey mix of stuff and asked, "What am I supposed to do?" And with a not-so-rare stroke of genius he said, "Make brownies!"

And, so I did. And they were pretty damn good, though they weren't quite brownies. They were a cross between brownies, fudge, and cake. I suppose you could call it brudgake. Or fraknies. Or accidental brownies.

I liked the latter.


Icing: Collide - Razor Sharp

Thursday, June 10, 2010

An Apple A Day

I was feeling pretty creative the other night and had a hankering for some sort of holiday-ish dessert. Something warm and welcoming. Cinnamon and apples. Nom. So, I thought, "Why not create another conglomerate of sugary awesomeness?"
And, after 3 hours of baking, a monster was born.

Part 1: Create an outer shell to house contents of yum.

From the get-go, I knew I wanted to make a cupcake. But how to weave apples and cinnamon in? That would come later. First, the cupcake.

I wanted something light that had a warm flavor, but nothing overpowering. How about vanilla? Sold.

Amy Sedaris's Vanilla Cupcakes


Note: I only made 12 cupcakes in case this was a major disaster. And, really, what single girl needs more than 12 cupcakes at time? I gave away most of them anyway.

These cupcakes ended up being the perfect balance of fluffiness and warmth (I apologize for the overuse of all variations of the word warm.) to house the lovely gooeyness (is that a word?) I was about to impart to the world. Hats off to Amy. I'll have to check out more of her recipes.


Part 2: BRAINS (bwains?)

The brain is the core of any being. The behemoths need brains to move swiftly (or loudly) and be their normal predatory selves. In my extensive experience, monsters don't have super smart brains - at least not those in conventional horror stories. For me, however, a smart monster, while an anomaly, is the monster that wins and I say, screw the hero.

As I have mentioned: CINNAMON AND APPLES! APPLES AND CINNAMON!

They will be the brains.

Apple Crumble

I halved this recipe too and still had too much. I would suggest quartering it for only 12 cupcakes. If I had made 24, I think half this recipe would have worked out nicely.

I also baked the oatmeal topping separately so that I could just sprinkle it on top of the cupcakes. You probably need about an eighth of the recipe, to be honest.

So, now that I had the outer skin and the core of brainy goodness, I needed something to cover its head. Considering the potential heaviness of the inner core of the cupcake, I knew I'd need the lightest frosting possible. In walked the heavy cream and the whisk. I wish I had a "walked into a bar joke" right now.

(Side note: I just noticed that there are things called "whips" and things called "whisks" and they look the same on the Internets. More on this at a later time.)

Part 3: Where's his hat?!
 Whipped cream frosting was the only answer to this dilemma. It's light and fluffy and has a slight coolness to help balance out the warmth (WARMTH) of the rest of the cupcake. Let me say that making this definitely put me significantly closer to shelling out some dough for a hand mixer. I think I whisked for 20 minutes. Best workout ever if you want strong forearms.

Whipped Cream Frosting

But, wait! Here are all the pieces. How to assemble?

This time in steps! With pictures!

Step 1: Baking! (You know how to do this, right?)


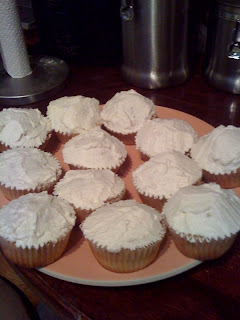
Step 2: Mmmm, cupcakes...


Step 3: Apple Crumble (while the cupcakes cool) -- I almost forgot to mention that I mashed the apple crumble (without the crumble) up with a potato smasher. Didn't want the apples to be too chunky inside the cuppycake.


 Step 4: Surgery!

(Cut out little cores from the cupcakes so you can smoosh some filling in them. Only cut about 3/4 of the way down, you don't want the cupcake to fall apart when the wrapper comes off. *gasp*)

(FILL!)

(Replace the core, but cut off a little bit from the bottom since you now have to compensate for filling.)

Step 5: Haberdashery!

 (Whipped cream with vanilla and a little cinnamon)


Step 6: NOM!
 (Sprinkled crumble part of Apple Crumble recipe and a little cinnamon over the cupcakes)

I'm hoping for more Dr. Franky cupcakes in the future. And we'll try to give them clever names like, Cupcake: Redemption or Revenge of the Cupcake.


Icing: Tegan and Sara - Alligator Tears

Monday, May 31, 2010

What's up doc?

So, my ankle is finally feeling better. Perhaps it was just a mild sprain? Either way, I'm happy I'm no longer hobbling around like an angry hobbit.

Though I'm working on expanding my knowledge of baking to start creating my own confections, I have dabbled a bit with experimentation.

The first successful experimentation occurred with my boyfriend's birthday cake. He had requested a carrot cake, which I had never made before so, naturally, I was intrigued. I started by looking up several recipes online to see what they entailed and after finding 2 that I thought might work well, I started to modify.

Recipe #1: Carrot Cake with Maple-Cream Cheese Icing
Recipe #2:
Carrot Cake with Cream Cheese-Lemon Zest Frosting

I used Recipe #1 as my base recipe but cut about 3/4 cup of sugar and 1 egg from the recipe. Then I added the nutmeg and vanilla from Recipe #2.

I didn't use either recipe's frosting recipe. Actually, I tried to make the icing from this recipe but hated it. So, I went back to an old standby icing recipe used for a friend's birthday cupcakes a few months ago.

And so my own little monster was created (thanks, Dr. Frankenstein for the inspiration).


I forgot to mention it was a Dinosaur/Mexican themed birthday party. So, I used green food coloring to make the icing green and baked star shaped sugar cookies (with orange icing from store-bought tubes) to create the spikes for the stegosaurus cake.

ROWR!

Icing: Siouxsie and the Banshees - 92 Degrees

A busted ankle means less time on my feet and more on my hands...

Our bimonthly game of kickball was a blast, though my ankle begs to differ. But this does leave me some time to do a little more digging.

If I haven't already explained, the purpose of this blog is for me to document my trials, tribulations, and overall expansion of knowledge regarding one of my favorite past times: baking.

While the amount of baking I've done over the past few years has steadily increased, I realized I have no idea why I do the things I do. Why is it better to use room-temperature eggs? Why does too much batter mixing cause cake to come out on the dense side? What's the difference between light and dark brown sugar? The list goes on and on.

This brings me to my first research project, which will be done whilst elevating my foot: Which books will help me learn the ins and outs of baking and better understand the science behind it all?

Lucky for me, my mom helped me along by picking up a copy of Ready for Dessert by David Lebovitz to start my collection. Mr. Lebovitz is a pastry chef originally from the San Francisco Bay area who has received a number of accolades and written tons of books.

Here's the man himself:


Some other books I have been looking at on Amazon include:
- Baking & Pastry: Mastering the Art and Craft by the Culinary Institute of America (which is where I'm taking a baking class later this year)

- The Professional Pastry Chef: Fundamentals of Baking and Pastry by Bo Friberg, a master pastry chef and confectioner

- How Baking Works: Exploring the Fundamentals of Baking Science by Paula I. Figoni, a professor of baking science and other classes at Johnson & Wales University

and

- Chocolates and Confections: Formula, Theory, and Technique for the Artisan Confectioner by Peter P. Greweling, a professor at the CIA


These books seem like they will help round out my knowledge of baking and - hopefully - help me learn enough about how everything works for me to start concocting more of my own recipes.

Icing: Snake River Conspiracy - Strangled

Saturday, May 29, 2010

Powder and Soda

In the beginning there was darkness. And then I opened the cabinet door and pulled out the baking powder and baking soda and stared at them bewildered, willing them to break from their inanimate pasts and explain what the hell they do for a living.

Seriously. When and why am I supposed to use them?

This is where the magic of the interwebs comes in.

This evening, I learned that the difference between baking soda and baking powder is that baking soda is pure sodium bicarbonate while baking powder is a mixture of sodium bicarbonate, an acidifying agent, and a drying agent. The purpose of these powders is to help dough leaven (or as I like to say, levitate) by producing carbon dioxide upon contact with dough or high temperatures.

Some notes:
- Baking Soda -
* The chemical reaction begins as soon as it comes in contact with dough, so anything made with baking soda must be baked immediately or the power of the chemical will fade
* Baking soda is a base and, thus, bitter to the tongue. Therefore, it should be combined with an acidic ingredient such as buttermilk, citrus, chocolate, or yogurt

- Baking Powder -
*
There are two types of baking powder:
1) single-acting, which is activated by moisture and, as a result, when combined with dough, it must be baked immediately
2) double-acting, which reacts in two phases. The first phase occurs when it comes in contact with moisture, releasing a small amount of carbon dioxide. During the second phase, most of the carbon dioxide is released, which happens when the dough is exposed to high temperatures

Some interesting morsels pulled off of the interwebs:
- Always sift or wisk baking soda or baking powder with other dry ingredients in your recipe to ensure uniformity. In other words, if you don't, you'll create giant carbon dioxide holes in your banana bread
- Baking soda causes cocoa powder to redden (see: Devil's Food Cake)
- When baking soda and baking powder are used simultaneously in a recipe, the baking soda is to neutralize acidity while the baking powder is mainly there for leavening

TADA! Mystery solved.

I feel like my childhood idol...


Nancy Drew...


Not what you expected?


Music (my icing): Acid Bath - Dead Girl


Credits:
About.com page on food chemistry
Joy of Baking page on baking soda and baking powder

Friday, May 28, 2010

The Beginning

Everyone needs a first post and this is mine.

I've been going through one of - I'm guessing - many life crises. From feeling lost and fumbly to unabashedly motivated, I'm all over the map. Simply put, now what?

I haven't lost my job, but am looking for a new outlet. One that will allow me to learn something. And hopefully this something will also give me the opportunity to be creative and innovative.

This is my goal, but one must start at the bottom and work her way up.

And so I begin.


Music: Cocteau Twins - Amelia